Word Processors
Highlighting

|

|
Highlighting is a very useful tool in Microsoft. When teachers are marking students papers he/she can highlight certain areas where students may have made mistakes or missed a main idea. It can also be good to highlight certain words or a way where you can highlight the various parts of a sentence as shown above.
Font colour

|
Changing the font colour in word is easy and has a similar effect to that of highlighting. In this exercise to the left, we can see that the student must highlight in red the topic of the sentence and in blue they highlight the controlling idea.
|
Word art and clipart

|

Word/clip art is a useful tool to use when teaching young children. The lessons you prepare become more engaging for both young and older learners. Sometimes people learn better if they have visual aids and cues. It brings colour and interest into your lessons as well. If you were teaching students vocab words of animals then it would be useful to have pictures of those sorts of animals to help them connect names with visual images.
|
Drawing

|

|
The drawing feature of word processor is useful in creating exercises for your class. It is easy to use and provides colour and interest for all learners. This feature allows you to insert all kinds of shapes and text anyway you like. In addition you can place shapes in side of shapes, use different colours, and use clipart also. Its definitely user friendly.
Tracking changes

track changes would be useful in writing classes because group work would be easier as students and teachers are able to access the same document and identify where changes on the assignment have been made by other students. It also helps teachers point out to students specific places in which students have made mistakes. This can help students learn from the mistakes of others. Corrections to the document can be made quickly and at anytime. These changes can either be accepted or declined by other people that see the document.
MAKING COMMENTS

This is a good way to help students know specifically where they have made mistakes and it is easy for them to identify. Its also quick and easy for the teacher to use. We could use it to point out things that we liked or things that could be improved. This feature allows students to see your comments on their work. You can help them without even having to talk to them allowing you time to work with other students. You don't actually have to make changes but you can make suggestions as to what you think would improve the writing. You can also distinguish who left the comments.
Formatting

|
FONT SIZE: Reducing the size of the font is simple to do. You can click on the drop down box and select or type which size font you would like.
|
|
LINE SPACING: This aspect of word is useful to change the spacing between letters of words, spacing of sentences on a page, bullet point spaces and several others. This can help in condensing down your enough to fit on to one page.
|

|

|

|
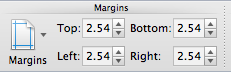
Margins: Adjusting the margins on your document will help you determine the boundary to where your text or other items on your document will fit between. You can either select a pre-determined setting as you see in the picture to the left or go to the custom margins option to create your own margin sizes.
|
|
Columns: This feature will help determine how the whole document will be displayed. In this customised menu of columns you can choose to either have one, two, three columns or columns to the left or right side of the document. You can customise your work by determining how many columns you would like and also the width and spacing of each.
|

|

|

|
Resizing Pictures: In this picture we can see how it's possible to resize pictures to fit more cohesively onto a one page document. To shrink the document down, several of the above steps were also taken like adjusting the columns, margins and line spacing. You must ensure that you resize the text also to match the size of the pictures. Sometimes when you resize the text box you may lose several of the words, so its important to make sure that you size the text boxes correctly.

|

|
Text Wrapping around the picture: To wrap text around a picture you can right click the picture on the document and then select the wrap text option. You have several options: You can wrap it square, tight, through, Top and Bottom or none. In the picture on the left, you can see that the text is wrapping around the picture of the gold bar.
